
Brian Long Consultancy & Training Services
Ltd.
March 2011
Accompanying source files available through this
download link
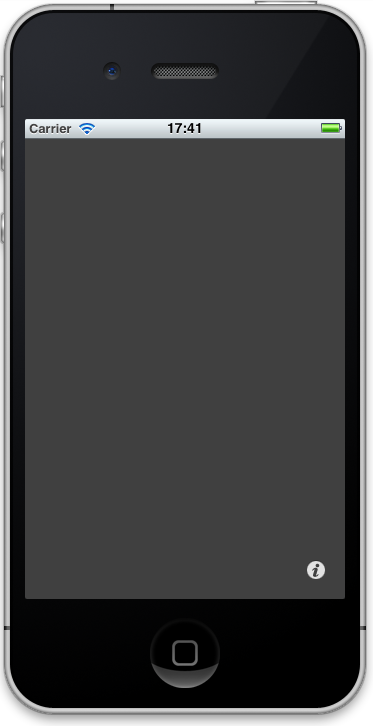
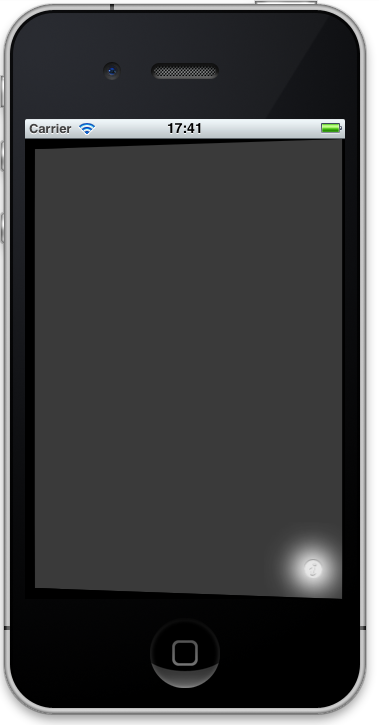
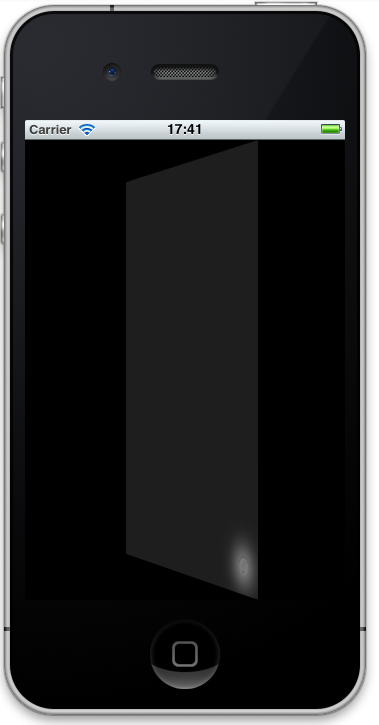
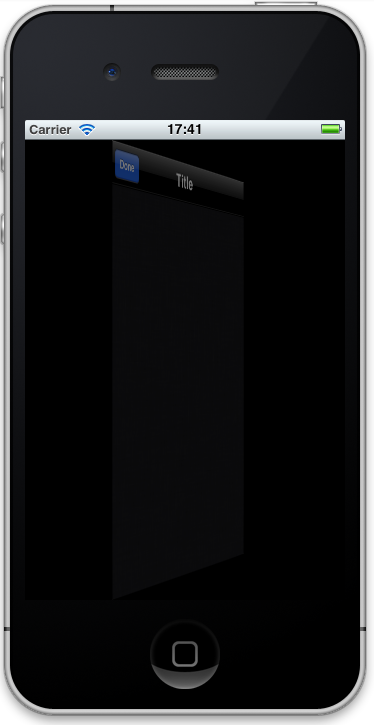
Another of the available project templates lets you build a Utility (iPhone Utility Project template). This is intended to be a simple application with two views. There’s a main view that comes up by default with a button that allows you to go to the other view. The main view has a little information button on it that when pressed flips over to reveal the other view (called the flipside view) in a nice animated manner. The flipside view has a navigation bar with a button that lets you go back to the main view, again using a nice flip animation.


There are a number of files in a Utility project so we should briefly run through
them. An empty window and the App Delegate are defined in Main.cs, MainWindow.xib
and the code behind file MainWindow.designer.xib.cs. The App Delegate creates an
instance of the main view controller, sizes its view appropriately and puts the
main view in the window. This main view and view controller are defined in MainView.cs
and MainViewController.cs, backed by MainView.xib and the code behind file MainView.xib.designer.cs.
If you load MainView.xib into Interface Builder you will see the Info Button and
can locate the action, showInfo:, defined in the controller. There
is a corresponding method in the main view controller that creates the flipside
view controller and flips it into view, as well as setting up a custom event handler
for the Done button on the flipside view’s Navigation Bar that closes it.
This Utility project makes an interesting departure from the style of the previous
projects here, in that the main view and main view controller (defined in the same
.xib file) have their own source files defining the classes. This is because we
have custom classes for both the view controller and the view (for both the main
view and also the flipside view) whereas in previous projects the view was a predefined
type, typically a UITableView. That said it is still common to do the
miscellaneous UI work (event handlers for the various controls) in the view controller
descendant, leaving the view descendant dedicated to any custom drawing or display
that it requires.
Let’s make use of a Utility project to build a web service consumer. We’ll use a simple SOAP-base web service that’s readily available to convert temperatures between degrees Celsius (or centigrade for older readers) and degrees Fahrenheit.
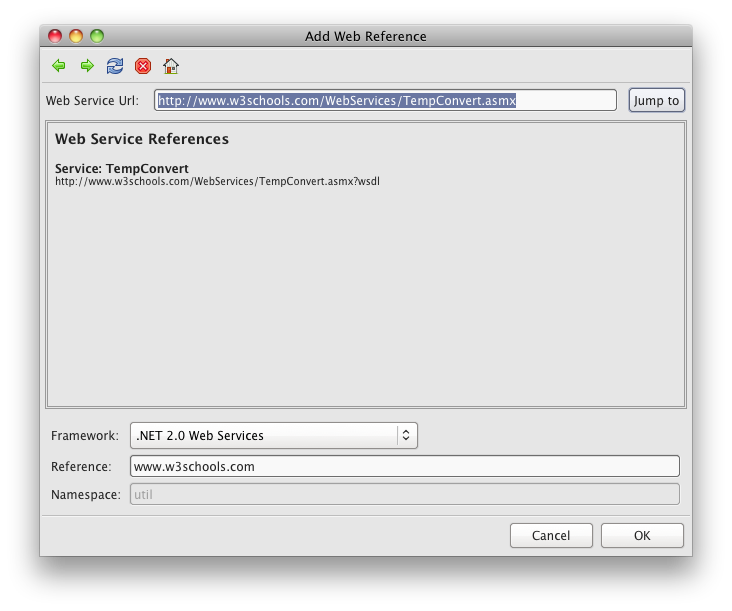
Make a new iPhone Utility Project, then in the Solution window, right-click on the project name and choose Add, Add Web Reference. This brings up the Web Services import dialog, which already has the URL of the simple temperature conversion web service filled in: http://www.w3schools.com/WebServices/TempConvert.asmx. Be sure to set the Framework to .NET 2.0 Web Services and then press OK to import the web service into the project.
If you use a web browser and enter that web services address you can see the capabilities
of this TempConvert web service are fairly meager, but adequate, offering
CelsiusToFahrenheit() and FahrenheitToCelsius(). And we’ll
surface these to the UI of this application.
Anyway, back to the results of using the web service import dialog:
This adds a Web References directory to the solution project. Oddly, the node contains only the reference name – www.w3schools.com if left at the default – and there seems to be no direct way of opening the generated source file. However, you can see the code by opening it manually from the directory from a file called Reference.cs. The generated proxy class is found therein. Its namespace is a combination of the project name and the Reference value, so if you saved your project as WebServices, say, and left the Reference value unchanged, then the namespace that defines this proxy class will be WebServices.www.w3schools.com.
The web service proxy class contains a plethora of methods offering different ways of calling the two web service methods, which can be simply divided into synchronous and asynchronous calls. The synchronous calls are as straightforward as this:
public string FahrenheitToCelsius(string Fahrenheit);
public string CelsiusToFahrenheit(string Celsius);
Note: The synchronous web service merthods are straightforward and tempting, but you should beware of synchronous web service calls as they will block while working and freeze the UI. If the web service calls are slow or time-consuming then your application will become unresponsive and users will not enjoy that aspect of your user experience. It is much better to use asynchronous (async) calls.
There are two different sets of async declarations offered. One set follows the typical .NET asynchronous programming model.
public System.IAsyncResult BeginFahrenheitToCelsius(string Fahrenheit, System.AsyncCallback callback, object asyncState);
public string EndFahrenheitToCelsius(System.IAsyncResult asyncResult);
public System.IAsyncResult BeginCelsiusToFahrenheit(string Celsius, System.AsyncCallback callback, object asyncState);
public string EndCelsiusToFahrenheit(System.IAsyncResult asyncResult);
To initiate the async web service method invocation you call either BeginFahrenheitToCelsius()
or BeginCelsiusToFahrenheit(), passing in the textual input value,
a reference to a callback that will be called when the web service method completes
and also an optional piece of state information that will be passed through to the
callback. Either method then returns an IAsyncResult object. Your application
then remains responsive while the web service method executes. When it is done the
callback will be invoked with the IAsyncResult object passed in with
the optional state information available in its AsyncState property.
The callback will not be called on the main UI thread but on the thread that the
web service method was invoked on.
The result of the web service method call is obtained by calling EndFahrenheitToCelsius()
or EndCelsiusToFahrenheit() as appropriate, passing in the IAsyncResult
object you got earlier. This is typically done inside the callback (on that secondary
thread), but can also be done in the main thread if required. For example, you could
call BeginFahrenheitToCelsius() and then continue normal UI processing
in order to do some necessary operations. When the main thread has done all it needs
to, or perhaps all it can do without the result of the web service call, you can
then call EndFahrenheitToCelsius(). If the web service call has concluded
you will immediately get the result. If it is still executing then the call will
block until the result is available.
The other set of methods in the web service proxy class offer asynchronous invocation in an event-driven fashion.
public event FahrenheitToCelsiusCompletedEventHandler FahrenheitToCelsiusCompleted;
public void FahrenheitToCelsiusAsync(string Fahrenheit);
public void FahrenheitToCelsiusAsync(string Fahrenheit, object userState);
public event CelsiusToFahrenheitCompletedEventHandler CelsiusToFahrenheitCompleted;
public void CelsiusToFahrenheitAsync(string Celsius);
public void CelsiusToFahrenheitAsync(string Celsius, object userState);
Here you can see two options for invoking each method, either with or without some
arbitrary state information. To get the results of the calls you hook an event handler
up to either FahrenheitToCelsiusCompleted() or CelsiusToFahrenheitCompleted()
as appropriate. These events are defined with the normal .NET event signature. The
event handler takes two parameters, the first being the object that triggered the
event and the seconds being an EventArgs descendant, either FahrenheitToCelsiusCompletedEventArgs
or CelsiusToFahrenheitCompletedEventArgs. Both of these offer the web
service call result in the Result property and the optional state information
in the UserState property. As with the previous async callbacks these
completion event handlers will be called on a secondary thread, not the main UI
thread.
Given the async completion callbacks and event handlers execute in a secondary thread it is important to note that you will not be able to directly access the UI controls from there. Code that accesses controls will compile but will do very little.
To access the UI from a secondary thread you must call InvokeOnMainThread(),
which takes an NSAction-compatible delegate (an anonymous method or
lambda will work fine) containing the UI code.
Okay, after that preamble let’s build the UI for this web service and move on to calling it. In the Utility app we’ll leave the main view alone for now and add controls onto the flipside view.
We need a Text Field for entering a temperature and a Label to describe it. Give
the Text Field a default Text attribute of 100 or some other temperature value,
set the Return Key attribute to Done and perhaps set the Keyboard attribute to Number
Pad as we only want to enter numeric temperatures (the number pad keyboard is just
that: a numeric keypad. This means we will not be able enter fractional temperatures
or negative temperatures thanks to the lack of – and .
on this keyboard). To choose between Celsius to Fahrenheit or vice versa we’ll use
a Segmented Control (UISegmentedControl), which can be used as two
buttons in one, or like a pair of radio buttons. You can edit each segment in turn
so give the two segments Title attributes of °C → °F and °F
→ °C.
All three of the characters in those Titles are plucked from the large spread of
options in the Unicode character set. To enter the characters in Interface Builder,
when you click in the Title attribute field choose Edit, Special Characters... from
the menu (or press
)
to invoke the Characters window. You can find this menu option in many applications
that allow text editing, although I notice Microsoft Word 2008 for the Mac is an
exception (instead it has its own character selection option accessible through
Insert, Symbol...).![]()
![]() T
T
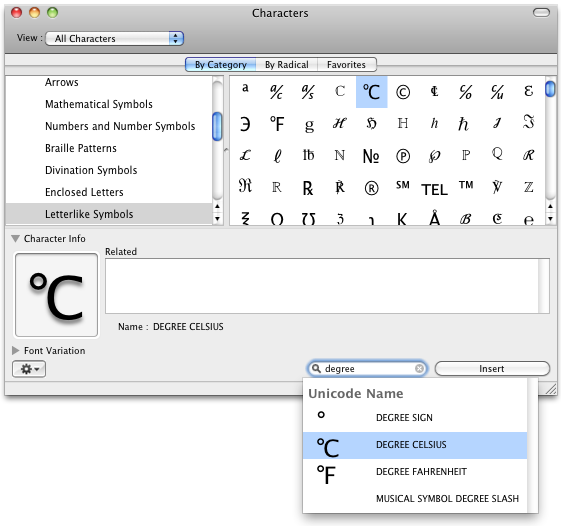
Using the lists and dropdowns on this window you can browse around a large number of different characters, but if looking for something specific the search box at the bottom is helpful. In the screenshot below it is being used to locate the two symbols for temperature units in the two scales we are working with. Similarly, searching for arrow gives a large number of arrows including the rightwards arrow symbol used in the two button segment titles.
Also needed on the view in Interface Builder is a Button, with a suitable Title,
to initiate the conversion and a Label to display the result. Additionally, given
the web service might take some time to execute, add on an Activity Indicator View
(UIActivityIndicatorView) and check both the Hide When Stopped and
Hidden attributes.
To have the code work you will need to add five outlets to the FlipsideViewController and connect them as shown here:
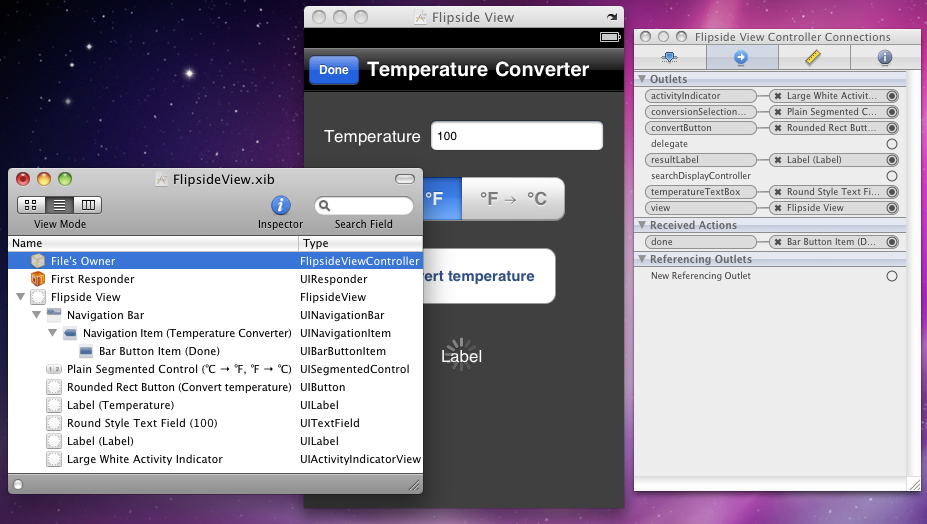
They would be activityIndicator, conversionSelectionButton,
convertButton, resultLabel and temperatureTextBox.
Don’t forget to add using WebServices.www.w3schools.com; at the top
of the source to access the proxy class’s namespace (WebServices.www.w3schools.com
is the namespace by default but can be changed in the web service import dialog).
Once that is done the code can be added.
In the ViewDidLoad() method we’ll clear the result label, create an
instance of the web service proxy class and set up an event handler to respond to
the conversion button being touched:
resultLabel.Text = "";
Converter = new TempConvert();
convertButton.TouchUpInside += HandleConvertButtonTouchUpInside;
Converter is a variable of type TempConvert declared in the view controller class. When
the convert button gets touched this is the code that executes:
void HandleConvertButtonTouchUpInside(object sender, EventArgs e)
{
resultLabel.Text = "";
double inputTemp;
if (double.TryParse(temperatureTextBox.Text, out inputTemp))
{
UIApplication.SharedApplication.NetworkActivityIndicatorVisible = true;
activityIndicator.StartAnimating();
if (conversionSelectionButton.SelectedSegment == 0)
Converter.BeginCelsiusToFahrenheit(temperatureTextBox.Text, FinishedTemperatureConversion, true);
else
Converter.BeginFahrenheitToCelsius(temperatureTextBox.Text, FinishedTemperatureConversion, false);
}
else
resultLabel.Text = "Invalid input temperature";
}
Assuming the text in the Text Field is numerical (given we specified a number pad
then it will either be a number or a blank string) then we start off by turning
on the network activity indicator on the status bar and also initiating our activity
indicator control’s animation. This way the user knows the application is busy doing
something and that the network is being accessed. The segmented control is checked
to see in which direction the conversion should be made and this controls whether
BeginCelsiusToFahrenheit() or BeginFahrenheitToCelsius()
is called. In this implementation a single method is used to act as a callback;
in case we need to know which direction the conversion was requested, a Boolean
value is passed through as the optional state information, and is designed to indicate
if it was a Celsius to Fahrenheit conversion (or not). The callback looks like this:
private void FinishedTemperatureConversion(IAsyncResult asyncResult)
{
var fromCelsius = (bool)asyncResult.AsyncState;
var answer = fromCelsius ?
Converter.EndCelsiusToFahrenheit(asyncResult) : Converter.EndFahrenheitToCelsius(asyncResult);
// Since we are running on a separate thread, we can not access UIKit
// objects from here, so we need to invoke those on the main thread:
InvokeOnMainThread(() => {
resultLabel.Text = string.Format(fromCelsius ? "{0}°C is {1:F2}°F" : "{0}°F is {1:F2}°C",
temperatureTextBox.Text, Convert.ToDouble(answer));
UIApplication.SharedApplication.NetworkActivityIndicatorVisible = false;
activityIndicator.StopAnimating();
});
}
The optional state information is extracted and restored to Boolean type. This is
used to decide whether to call EndCelsiusToFahrenheit() or EndFahrenheitToCelsius()
to extract the result of the temperature conversion, after passing in the received
IAsyncResult object. In order to write the result out and turn off
the activity indicators we execute the next bit of code indirectly via InvokeOnMainThread(),
since we aren’t running in the UI thread (as discussed earlier).
That works quite well except for the keyboard, which has not been encouraged to
disappear after you’ve entered your chosen temperature. That can be addressed by
hooking event handlers to trigger when any other control is used and implementing
them to make the keyboard go away. These two statements can be added to ViewDidLoad()
– note that the convert button now has two TouchUpInside event handlers:
convertButton.TouchUpInside += AnyNonTextControlTouched;
conversionSelectionButton.ValueChanged += AnyNonTextControlTouched;
The handler itself is straightforward and matches what we have seen in a previous example:
private void AnyNonTextControlTouched(object sender, EventArgs e)
{
temperatureTextBox.ResignFirstResponder();
}
Now we have a functioning web service application with the functionality resident on the flipside of a blank main screen.
Before looking to address that blankness it might
be good to see what the code looks like when using the event-based async web service
methods as opposed to the Begin/End async methods we just
employed. These statements need adding to the ViewDidLoad() method
immediately after constructing the web service proxy:
Converter.CelsiusToFahrenheitCompleted += HandleConverterCelsiusToFahrenheitCompleted;
Converter.FahrenheitToCelsiusCompleted += HandleConverterFahrenheitToCelsiusCompleted;
Notice we now have two separate event handlers as they take a different EventArgs-descendant
parameter. The button event handler changes to look like this:
void HandleConvertButtonTouchUpInside(object sender, EventArgs e)
{
resultLabel.Text = "";
double inputTemp;
if (double.TryParse(temperatureTextBox.Text, out inputTemp))
{
UIApplication.SharedApplication.NetworkActivityIndicatorVisible = true;
activityIndicator.StartAnimating();
if (conversionSelectionButton.SelectedSegment == 0)
Converter.CelsiusToFahrenheitAsync(temperatureTextBox.Text);
else
Converter.FahrenheitToCelsiusAsync(temperatureTextBox.Text);
}
else
resultLabel.Text = "Invalid input temperature";
}
Notice that since we have two separate web service method completion event handlers there is no need for the optional state parameter to be passed through. Here are those event handlers:
void HandleConverterCelsiusToFahrenheitCompleted(object sender, CelsiusToFahrenheitCompletedEventArgs args)
{
InvokeOnMainThread(() =>
{
resultLabel.Text = string.Format("{0}°C is {1:F2}°F", temperatureTextBox.Text, Convert.ToDouble(args.Result));
UIApplication.SharedApplication.NetworkActivityIndicatorVisible = false;
activityIndicator.StopAnimating();
});
}
void HandleConverterFahrenheitToCelsiusCompleted(object sender, FahrenheitToCelsiusCompletedEventArgs args)
{
InvokeOnMainThread(() =>
{
resultLabel.Text = string.Format("{0}°F is {1:F2}°C", temperatureTextBox.Text, Convert.ToDouble(args.Result));
UIApplication.SharedApplication.NetworkActivityIndicatorVisible = false;
activityIndicator.StopAnimating();
});
}
With this alternate async web service invocation replacing the original bits of code, the application operates the same as before, but now we've seen the different options available to us.
Go back to the top of this page
Go back to start of this article