
Brian Long Consultancy & Training Services
Ltd.
January 2012

Building the app, deploying it to a device or suitable AVD (emulator) and pressing the button on the main activity now gives us a Google map!
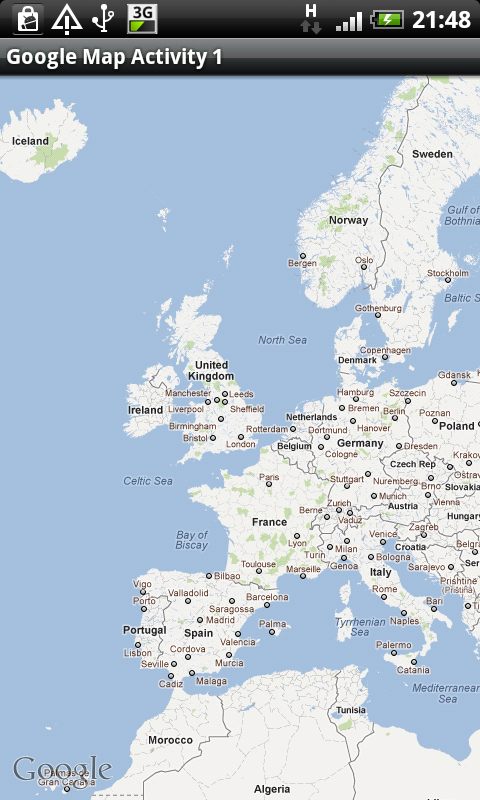
I'll grant you it's a plain map that can only be scrolled around by dragging a finger, and zoomed in and out with pinch movements, but nevertheless it's a Google map app.
Let's make it a little more interesting by adding the familiar Google zoom controls,
setting an initial zoom level and switching to satellite mode. This means changing
the onCreate() method slightly:
The maps documentation explains the MapView setSatellite() and setBuiltInZoomControls() methods, which have
been accessed as the implied write-only properties Satellite and
BuiltInZoomControls. The getController() method (read-only Controller
property) returns a MapController object that can be used to control
the map in various ways, such as zooming, animating, centering etc.
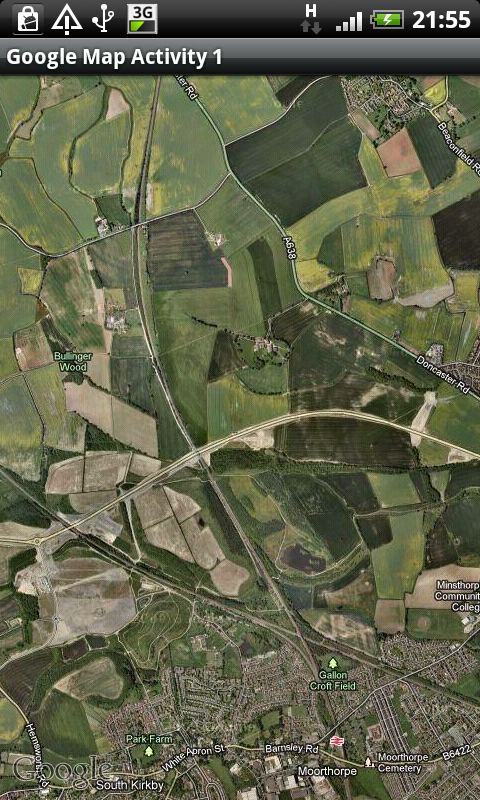
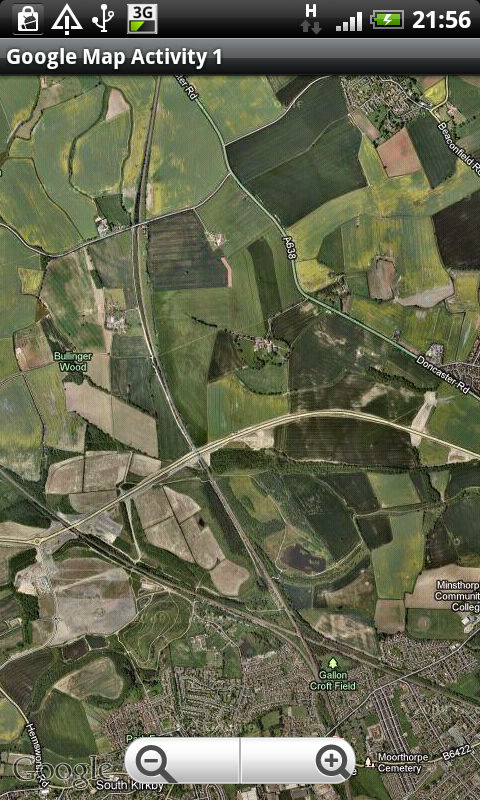
Now the map looks like this. The first image is how it looks by default and the second one shows the zoom controls that appear if you tap the map and disappear after a few seconds of inactivity.
If you wish to add keyboard zooming support for those who happen to have a physical keyboard
on their Android device, this is quite straightforward to do. You simply need to
override the onKeyDown() virtual method:
Note: when you type the word method in the class declaration,
as soon as you add a space a code completion (or IntelliSense) box pops up offering
to enter an override for all overridable methods in the ancestor classes. One annoyance
you will quickly bump into is that whilst it will successfully add in a declaration
and implementation for the method you choose, the argument names will not be as
you expect. The argument names set up for the method will not match those listed
in the Android SDK for that method. Instead they will be listed as arg1,
arg2, arg3 etc. This is a big shame and it quickly becomes
quite tedious to manually update them by referring to the documentation.
The reason for this limitation in Oxygene for Java is that Java libraries do not
retain argument names in the compiled libraries, so Oxygene is unable to extract
them from the class information it has available.
However, the Eclipse development tool can get the official argument names
for Java developers, so why the disparity? Well, Eclipse makes use of the Javadoc
documentation comments, which are common throughout the Android source code, and
are emitted into Javadoc files available in the Android SDK directory structure.
Hopefully a future build will start reading these Javadoc files and improve this
situation.
Ok, let's ramp things up a bit and make use of a MapView overlay. An
overlay is as it sounds - some output rendered on top of the map. You can build
custom overlays but there is a pre-built one in the Maps external library called
MyLocationOverlay. This overlay uses the Android
LocationManager to ascertain the device's location and implements the
LocationListener interface to allow you to
respond to the location changing, or the location providers disabling and enabling.
This requires additional permissions to be declared in your manifest file (lines
16 and 17):
MyLocationOverlay can also display a compass that indicates your bearing.
This is achieved using the SensorManager class to follow the on-board
compass (orientation sensor) and implements the SensorListener interface to allow you to also
respond to bearing changes.
There are a couple of guidelines to using this control correctly. If you want to
have the overlay display the current location then you call enableMyLocation().
It's best to do this in an overridden onResume() method and also
call the corresponding disableMyLocation() in onPause().
If you want to see the compass then you call enableCompass() and
disableCompass() in a similar way.
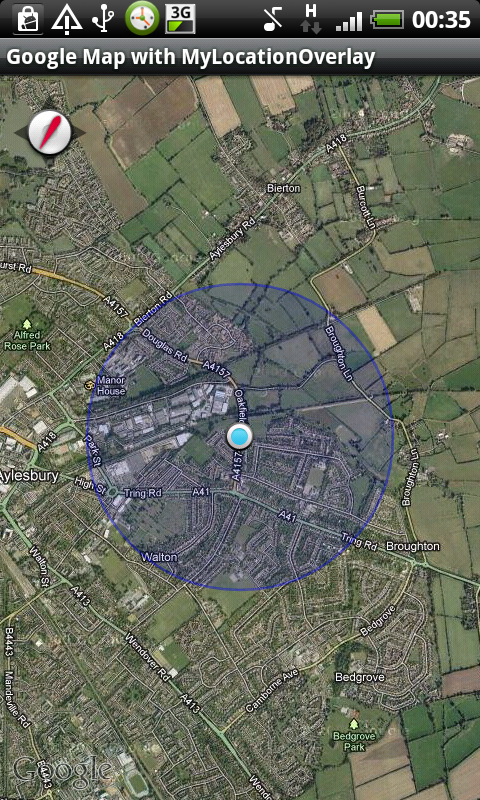
The default behaviour of MyLocationOverlay is to indicate the device location on
the map with a marker in the centre of a blue circle. The circle represents the
entire area the device could be located based on the accuracy of the location
reading. It uses both the network provider and the GPS provider (if they are
enabled) to try and get the best location, favouring the GPS provider as it can
provide a much more accurate result. As additional location readings come in,
because the fix is getting more accurate or because you are moving, the marker
and circle are redrawn appropriately.
Note: the network location provider uses the nearest network cell to give a broad idea of where the device is with a low accuracy (coarse location detection). The GPS provider can produce much more accurate location detection (fine location detection).
However, when the location display is first started the map view is most likely
not going to be displaying the right area for the location circle to be visible.
To overcome this small hurdle we can use the runOnFirstFix() method. This takes a Runnable interface reference and will run the
code in the interface's
run method as soon as the MyLocationOverlay
gets a fix on your location. We can use this to execute a call to the map controller
and ask it to animate the map across to the acquired map coordinate (this is easiest
done using inline interface implementation).
Here's the important code from a simple activity using a MyLocationOverlay. Note
that I've created a fresh activity in the sample application for this, but
there's no reason why you can't build on the activity we had from the earlier.
With my GPS disabled the running app looks like this:
Whilst the MyLocationOverlay is now operating agreeably it still suffers from
something of a drawback in that if you were to move the device (or indeed just scroll
the map) so the device location is not displayed on the map portion displayed onscreen,
there is no automatic feature to reposition the map so you can see it. However this
is quite straightforward to deal with. You'll recall a little earlier I mentioned
that MyLocationOverlay implements the LocationListener interface; this offers a handy
onLocationChanged() method that we can override
in a simple descendant class to address this shortcoming.
This sample class will do the job.
If you create an instance of this MyGoogleMapLocationOverlay in place
of the original MyLocationOverlay you will be able to drag the map
around to lose the view of the device location and the next location update received
will bring it back onscreen.
Note: the main LocationManager class uses Location objects that work with regular latitude
and longitude coordinates measured in degrees. However the Google Maps library uses
GeoPoint objects, which work with latitude
and longitude values measured in microdegrees, hence the multiplication by 1,000,000
(or 1E6).
Testing the application on a device works fine as the device offers a network location provider as well as a GPS location provider. However if you are testing a Google map app in the emulator (an AVD) then both these services are absent by default. The reasons are obvious - there is no GPS device in the computer that the emulator is hooked up to, and the device isn't connected to the same type of mobile network as a telephone is.
That all being so, you can still control the emulator and tell it to emulate that it has detected the current location. You do this using an Android SDK tool called DDMS (the Dalvik Debug Monitor System). Normally DDMS is useful for observing log messages when applications are running outside the debugger.
Note: DDMS uses the same mechanism to hook into the Android sub-system as the Oxygene debugger. Because of this, if DDMS is running then you won't be able to launch the Oxygene debugger. Always remember to close DDMS before embarking on any debugging.
DDMS has a lot of tabs offering options for viewing emulator information or controlling the emulator. The Emulator Control tab has options to control the telephony status, to emulate a telephone call and to either specify a location or pass a route file in to emulate the device being taken on a journey.
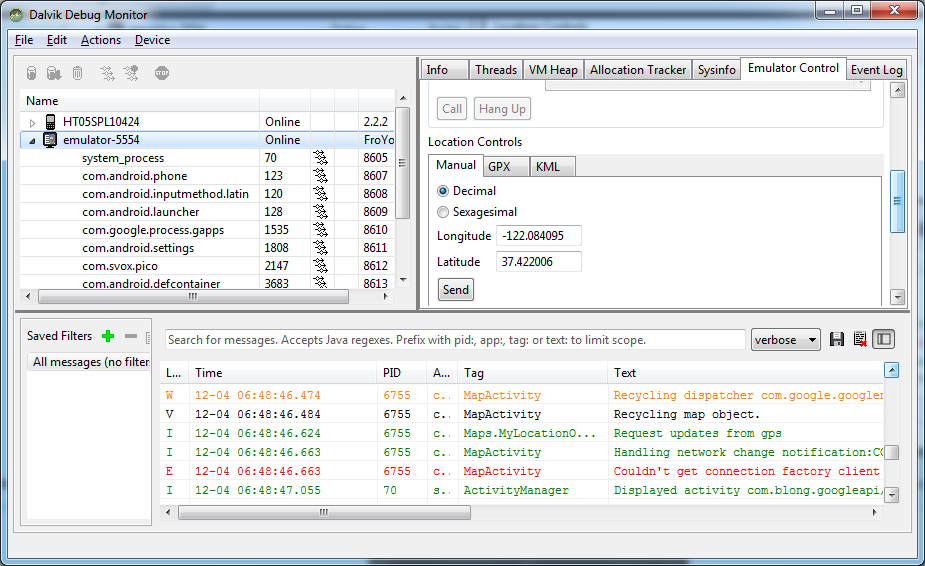
There is a default pair of coordinates set up and as soon as you press the Send button the emulator activates its GPS icon and acts as if it has got a fix on the device location:
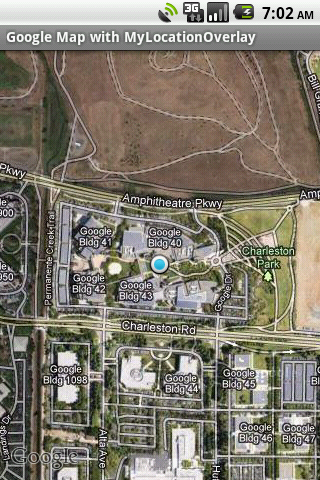
You'll note (especially if you zoom in a little on the map) that the default coordinates are those of the Google headquarters. You can also see no evident blue circle around the location marker, which tells us that the location was either considered to be completely accurate or had no accuracy data associated with it.
Go back to the top of this page
Go back to start of this article